25 KiB
| description | title | keywords | image | slug | last_update | |||||
|---|---|---|---|---|---|---|---|---|---|---|
| Create a doc page with rich content. | Wiki Template - CN version |
|
https://files.seeedstudio.com/wiki/seeed_logo/logo_2023.png | /cn/name_your_website |
|
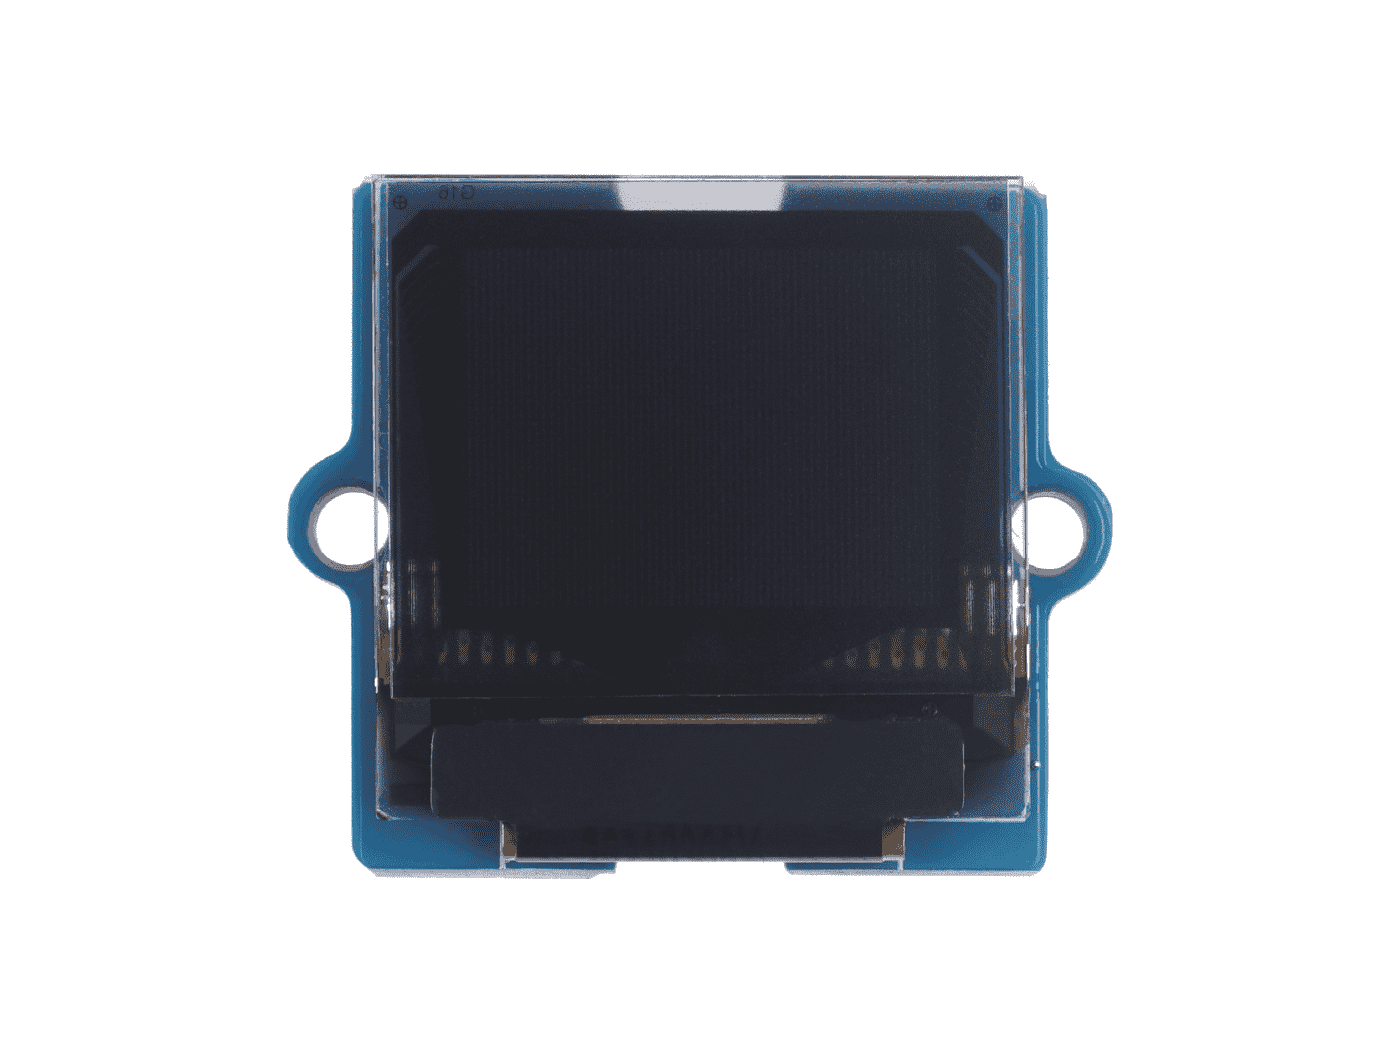
产品图:

购买链接附上:
Introduction
此处完成产品的介绍
包括产品的简单介绍、优势、应用场景等。
产品的组成可以通过列表来展示。
| Item | Value | Remarks |
|---|---|---|
| CPU | ||
| Flash Memory | KB | |
| Memory | ||
| SRAM | KB | |
| Module Storage | ||
| Carrier Board Storage | ||
| Wifi | ||
| Display | ||
| Bluetooth |
Features部分用无序列表列出。
Hardware Overview
Before everything starts, it is quite essential to have some basic parameters of the product. The following table provides information about the characteristics of 产品名称.
| Characteristic | Value | Unit |
|---|---|---|
| Operating Voltage | mW | |
| Power Consumption | mA | |
| Output Voltage/Current | mV/mA | |
| Measurement Range | ||
| Field of View | ||
| Rate(这里可以是传感器返回数据的默认频率) | ||
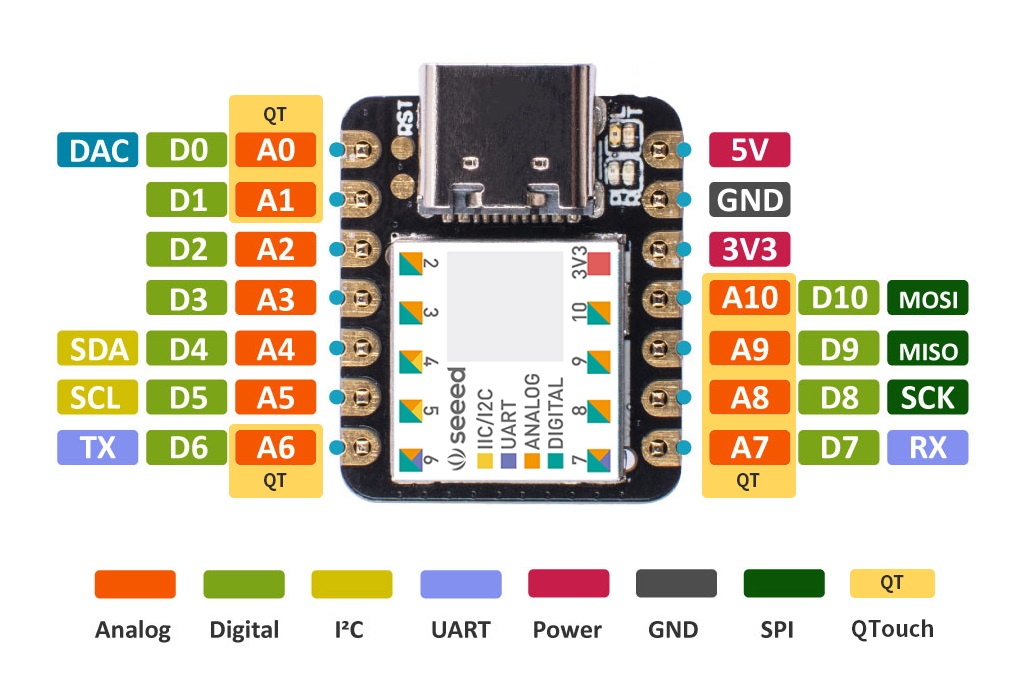
| Digital I/O Pins | 列出引脚 | - |
| Analog I/O Pins | 列出引脚 | - |
| I2C interface | 列出引脚 | - |
| I2C Address(如果是IIC通信的话) | ||
| SPI interface | 列出引脚 | - |
| UART interface | 列出引脚 | - |
| Power supply and downloading interface | Type-C | - |
| Dimensions | mm |
在下方可以放上引脚图。

Getting Started
如果是产品类,可以直接从下面开始:
Equipment Installation
如果设备需要安装部件或者组装后才可使用,请在这里填写步骤。
Environmental Preparation
如果产品对系统环境有要求,需要介绍支持系统下的环境配置,例如驱动的安装和安装包的提供等的内容。
install -Windows
install -MacOS
Boot
如果设备有烧录固件的方法,请在这里提供步骤。
Reset
如果设备有重置的方法,请在这里提供步骤。
:::note
> 使用设备的注意事项也可以在这里提。
:::
Arduino Library Overview
:::tip If this is your first time using Arduino, we highly recommend you to refer to Getting Started with Arduino. :::
请大概介绍产品使用的库,比如是基于什么编写的,是否可以直接通过Arduino IDE下载?除了这种方法以外请附上GitHub的下载链接。
Function
Before we get started developing a sketch, let's look at the available functions of the library.
函数名称—— 功能、作用、可选参数、输入输出
Default Variables
请介绍出现的全局变量
Installation
- Method One
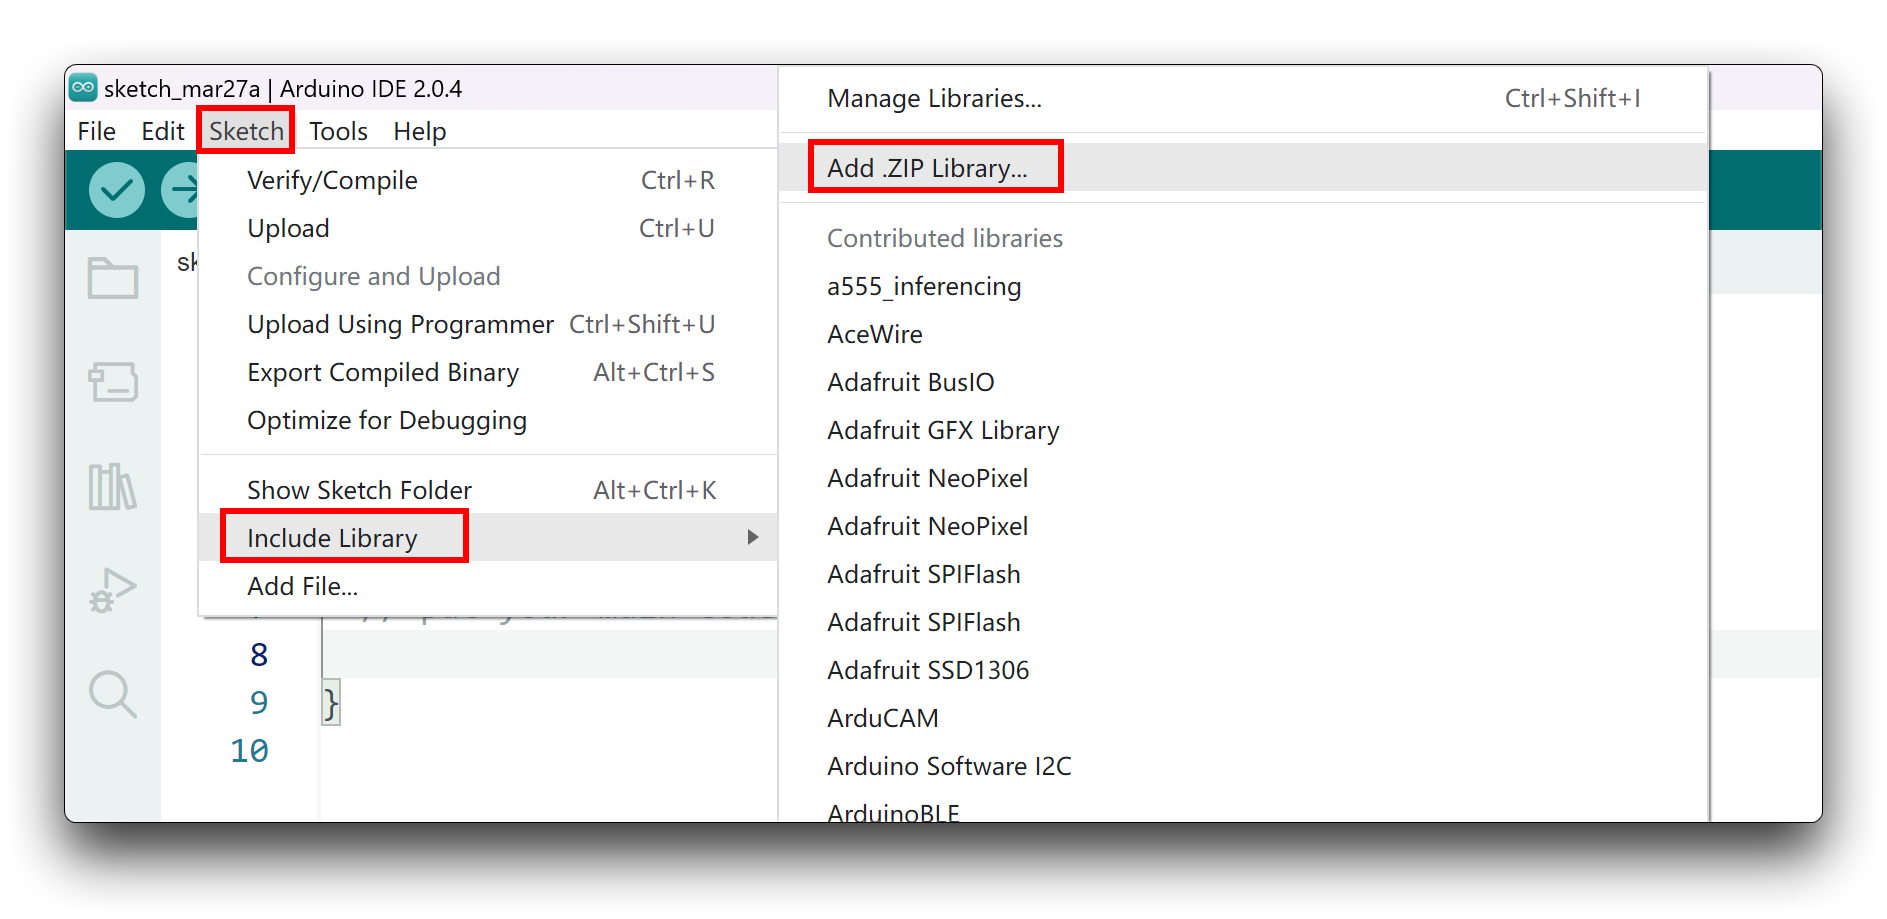
Since you have downloaded the zip Library, open your Arduino IDE, click on Sketch > Include Library > Add .ZIP Library. Choose the zip file you just downloaded,and if the library install correct, you will see Library added to your libraries in the notice window. Which means the library is installed successfully.

- Method Two
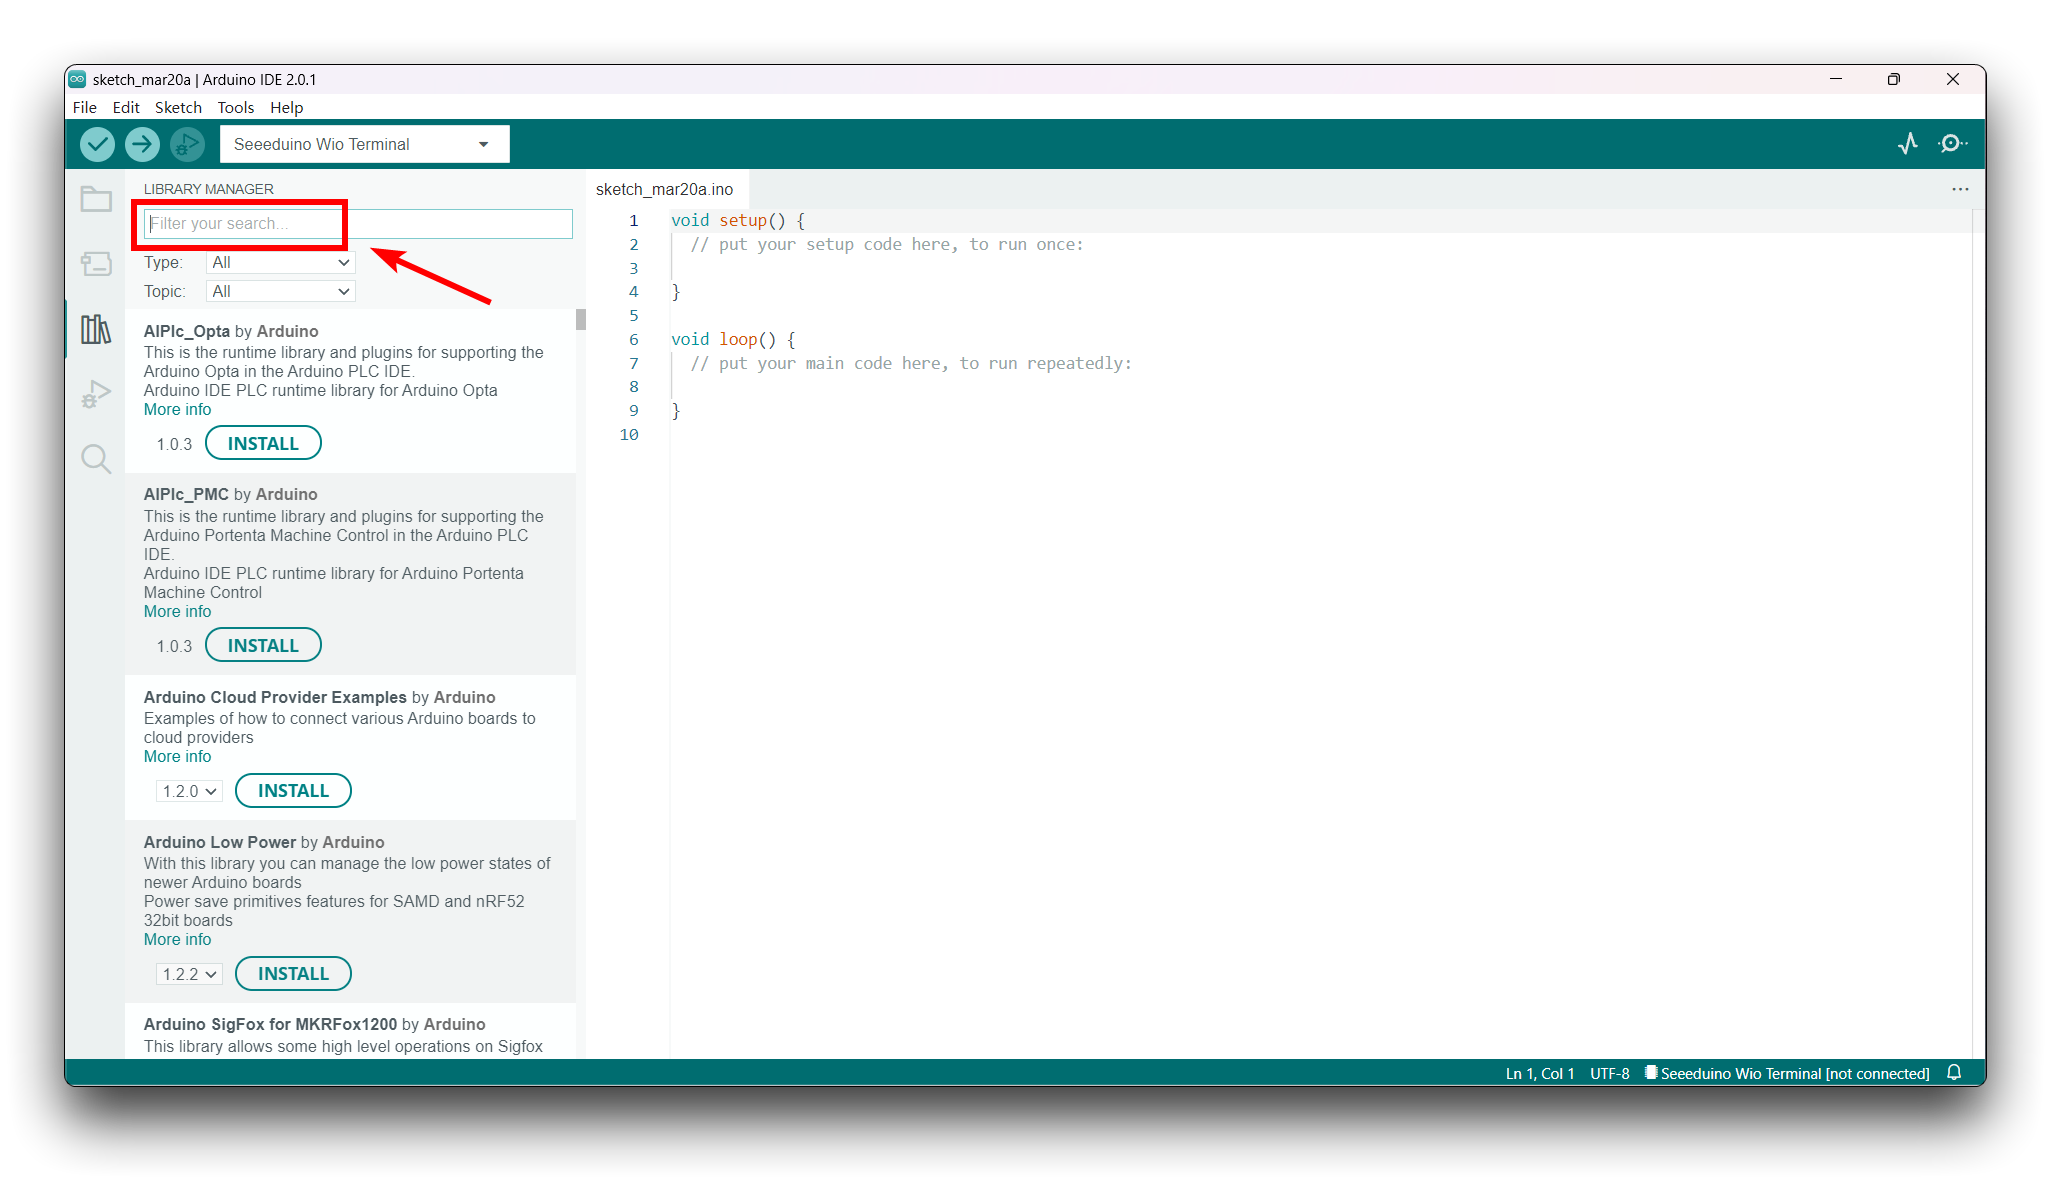
The library manager was added starting with Arduino IDE versions 1.5 and greater (1.6.x). It is found in the 'Sketch' menu under 'Include Library', 'Manage Libraries...'

When you open the Library Manager you will find a large list of librar ies ready for one-click install. To find a library for your product, search for the product name or a keyword such as 'k type' or 'digitizer', and the library you want should show up. Click on the desired library, and the 'Install' button will appear. Click that button, and the library should install automatically. When installation finishes, close the Library Manager.

Upgrading the Package
介绍未来的升级方式和操作步骤。
Arduino / XIAO Example
Now that we have our library installed and we understand the basic functions, let's run some examples for our 产品名称 to see how it behaves.
将重复且相同的步骤放前面。
Step 1. Launch the Arduino application.

Step 2. Select your development board model and add it to the Arduino IDE.
-
If you want to use Seeed Studio XIAO SAMD21 for the later routines, please refer to this tutorial to finish adding.
-
If you want to use Seeed Studio XIAO RP2040 for the later routines, please refer to this tutorial to finish adding.
-
If you want to use Seeed Studio XIAO nRF52840 for the later routines, please refer to this tutorial to finish adding.
-
If you want to use Seeed Studio XIAO ESP32C3 for the later routines, please refer to this tutorial to finish adding.
-
If you want to use Seeed Studio XIAO ESP32S3 for the later routines, please refer to this tutorial to finish adding.
-
If you want to use Seeeduino V4.3 for the later routines, please refer to this tutorial to finish adding.
Demo 1 建议是使用的模块名字或者是项目名
示例1的功能和应用场景介绍。
Materials Required
此处是运行本示例需要的材料和购买链接
| Name | Name |
|---|---|
//文件名

代码段
此代码可以进行怎么样的修改以完成怎么样的操作。(介绍可延伸性)介绍demo中是否有一些难以理解函数的用法,可在此加以说明。
贴图,效果展示。
例
Opening your serial monitor to a baud rate of 9600 should show the distance between the sensor and the object it's pointed at in both millimeters and feet. The output should look something like the below image.
Demo 2 建议是使用的模块名字或者是项目名
示例2的功能和应用场景介绍。
Materials Required
此处是运行本示例需要的材料和购买链接
| Name | Name |
|---|---|
//文件名

代码段
此代码可以进行怎么样的修改以完成怎么样的操作。(介绍可延伸性)介绍demo中是否有一些难以理解函数的用法,可在此加以说明。
贴图,效果展示。
例
Opening your serial monitor to a baud rate of 9600 should show the distance between the sensor and the object it's pointed at in both millimeters and feet. The output should look something like the below image.
Python Package Overview
:::tip
If this is your first time using Raspberry Pi, we highly recommend you to refer to Getting Started with Raspberry Pi.
:::
请在正文开始注明兼容性,测试使用的树莓派型号、系统版本等信息。还有使用的Python信息。
然后加一些简单的介绍作为开场。
Function
Before we get started developing a sketch, let's look at the available functions of the library.
函数名称—— 功能、作用、可选参数、输入输出
Installation
Online one-click installation
One-click installation, quick start, what ever you call, with the single command below, we can install/update all dependencies and latest grove.py.
:::caution
If you are using Raspberry Pi with Raspberrypi OS >= Bullseye, you cannot use this command line.
:::
curl -sL https://github.com/Seeed-Studio/grove.py/raw/master/install.sh | sudo bash -s -
:::info
if everything goes well, you will see the following notice.
Successfully installed grove.py-0.5
#######################################################
Lastest Grove.py from github install complete   !!!!!
#######################################################
:::
Step by step installation
Besides the one-click installation, you can also install all the dependencies and latest grove.py step by step.
:::caution
If you are using Raspberry Pi with Raspberrypi OS >= Bullseye, you have to use this command line only with Python3.
:::
git clone https://github.com/Seeed-Studio/grove.py
cd grove.py
# Python3
sudo pip3 install .
Dependencies
介绍导入的库和依赖包信息。
Default Variables
请介绍出现的全局变量。
Class
请介绍设置的python代码类。
Upgrading the Package
介绍未来的升级方式和操作步骤。
Raspberry Pi Example
Now that we have our library installed and we understand the basic functions, let's run some examples for our 产品名称 to see how it behaves.
将重复且相同的步骤放前面。
Step 1.
Step 2.
Step 3.
Demo 1 建议是使用的模块名字或者是项目名
示例1的功能和应用场景介绍。
Materials Required
此处是运行本示例需要的材料和购买链接
| Name | Name |
|---|---|
//文件名

代码段
此代码可以进行怎么样的修改以完成怎么样的操作。(介绍可延伸性)介绍demo中是否有一些难以理解函数的用法,可在此加以说明。
贴图,效果展示。
Demo 2 建议是使用的模块名字或者是项目名
示例2的功能和应用场景介绍。
Materials Required
此处是运行本示例需要的材料和购买链接
| Name | Name |
|---|---|
//文件名

代码段
此代码可以进行怎么样的修改以完成怎么样的操作。(介绍可延伸性)介绍demo中是否有一些难以理解函数的用法,可在此加以说明。
贴图,效果展示。 例
Troubleshooting
我们在收到研发的内容之后,可以记录下自己在执行demo中遇到的问题,然后记录在此,帮助用户少踩坑。
Resources
Tech Support & Product Discussion
Thank you for choosing our products! We are here to provide you with different support to ensure that your experience with our products is as smooth as possible. We offer several communication channels to cater to different preferences and needs.
附录
HTML表格
| Button Header | ||||
|---|---|---|---|---|
 |
1 | PWR BTN | 7 | AUTO ON |
| 2 | GND | 8 | DIS | |
| 3 | FC REC | 9 | UART TXD | |
| 4 | GND | 10 | UART RXD | |
| 5 | SYS RET | 11 | LED + | |
| 6 | GND | 12 | LED - | |
注释
HTML表格超链接
HTML表格文字超链接
锚点
Placeholders
Getting Started -- Special notes on command line -- Placeholders
文字颜色高亮
export const Highlight = ({children, color}) => ( <span style={{ backgroundColor: color, borderRadius: '2px', color: '#fff', padding: '0.2rem', }}> {children} );
上面这段话应该放在需要高亮Wiki的最前面。
Docusaurus green and Facebook blue are my favorite colors.
<span style={{backgroundColor: 'red'}}>Foo
Tabs
import Tabs from '@theme/Tabs'; import TabItem from '@theme/TabItem';
This is an apple 🍎 This is an orange 🍊 This is a banana 🍌分栏窗口
警告与提示
:::note
Some content with Markdown syntax. Check this api.
:::
:::tip
Some content with Markdown syntax. Check this api.
:::
:::info
Some content with Markdown syntax. Check this api.
:::
:::caution
Some content with Markdown syntax. Check this api.
:::
:::danger
Some content with Markdown syntax. Check this api.
:::
插入视频
可缩略文本
Click here to preview the full code
在线原理图预览
Learn More
无框线表格


无底色表格
📚 Learn More |
📚 Learn More |
📚 Learn More |
